Set your belt snug and low on your hips, centre heavier items, and test with a short run before committing to anything longer; that single approach eliminates most bounce and chafe. Use the two-finger rule when fastening the strap, keep heavy gear centred and light gear to the sides, and adjust after the first kilometre, not after the fact.
TL;DR:
- Use a snug, low-positioned belt with the two-finger rule, and recheck fit after the first kilometer to prevent bounce and chafe.
- Match belt type to run duration and terrain, with gel belts for under 90 minutes and vests for longer or unsupported routes.
- Organize kit with the heaviest items centered and lightest on the sides, using secure pockets for keys and ID, and quick-access for gels and the flask.
- For runs over two hours, carry a larger capacity setup with multiple gels, electrolyte tablets, and a bigger flask, adjusting to heat and hot conditions.
- Always test a new belt with a short run to confirm fit, location, and bounce, rechecking every 45 to 60 minutes during longer efforts.
Table of Contents
- Types of running belts and when to use each
- How to size and fit your belt for zero bounce
- Organising kit: what to carry and where to place items
- Hydration and nutrition configuration by run duration
- Anti-bounce techniques and material choices
- Test and tweak: short-run checklist and troubleshooting
- STRYQ testing notes and product fit: how our kit supports this setup
- Author perspective: practical priorities when setting up a belt for trail runs
- Carrying hydration that stays put: our soft flasks for belt setups
- FAQ
- Sources
Types of running belts and when to use each
A running belt is not one product. It is a category, and matching the category to the run matters more than brand or price.
Stretch-gel belts are thin, low-capacity bands built to hold a handful of gels and little else. Hydration or bottle belts add one or two flask holsters to that same low-profile chassis. High-capacity waistpacks sit wider across the back and carry a phone, a jacket and food together. Race belts sit between the gel belt and the waistpack, built for fastening a bib and carrying minimal fuel rather than hydration.
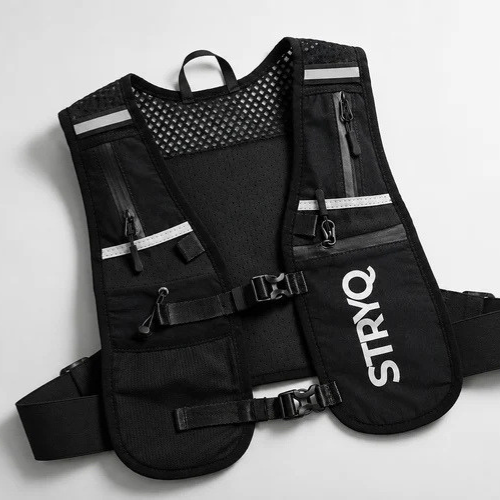
Belts are ideal for shorter efforts under two hours or races with frequent aid stations, while longer distances tend to call for a vest with greater fluid capacity and room for mandatory kit. Terrain plays its part too: flatter, faster trails favour a belt or handheld, while technical or unsupported routes favour a vest or pack.
Quick decision rules:
- Under 90 minutes, aid stations nearby: a stretch-gel belt is enough.
- 90 minutes to 2 hours, no reliable refills: a bottle belt with one soft flask.
- Over 2 hours or unsupported: a waistpack or, better, a hydration vest.
- Race day with a bib and minimal fuel: a race belt alone.
Each style trades capacity for stability. The more a belt carries, the more it needs a wide chassis and firm anchoring, which the next section covers in detail.
How to size and fit your belt for zero bounce
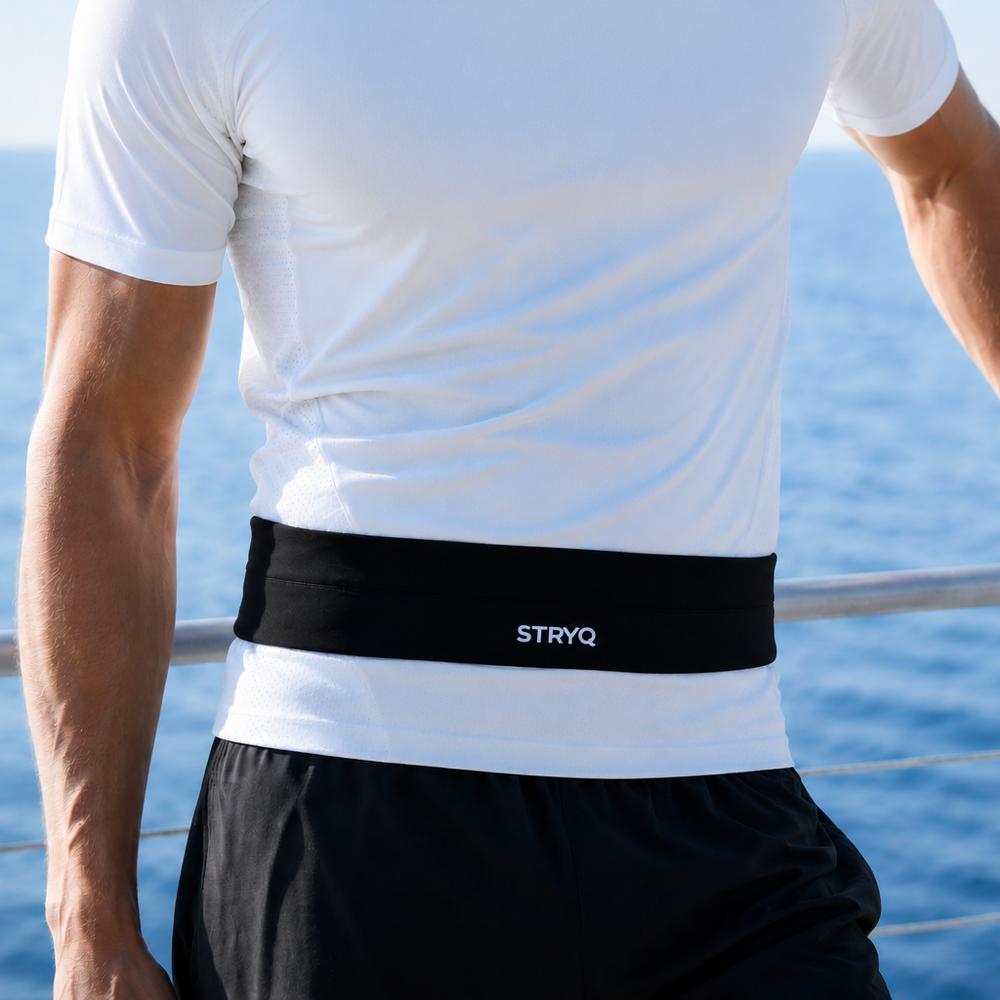
Fit decides whether a belt disappears on your hip or reminds you it exists every stride. Setting up a belt for zero bounce starts with a snug fit that sits flat on the waist, positioned low rather than high.
- Measure at your narrowest waist, not your hips, using a tape or the belt’s own strap pulled taut.
- Position the belt on your iliac crest, the bony ridge at the top of your hips, not around your natural waistline.
- Apply the two-finger rule: two fingers should slide under the strap with light resistance. Any looser and it will slide; any tighter and it will dig in.
- Fasten slightly firmer than feels comfortable standing still, because running motion loosens a standing fit within the first few hundred metres.
- If you’re between sizes, size down and rely on the adjuster rather than sizing up and cinching a slack strap to its limit.
- Jog on the spot for 30 seconds, then do a short hill repeat if one is nearby, watching for upward creep or side-to-side swing.
Common mistakes include fastening the belt while standing upright with a relaxed midsection, which feels fine until the first mile loosens everything, and letting the belt sit above the hip bones, where it has nothing to grip and migrates upward on climbs.
Pro Tip: Fit the belt, fill it with your actual gear, then re-check the two-finger gap. An empty belt always feels looser than a loaded one.
Organising kit: what to carry and where to place items
A belt’s comfort depends less on what you carry than on where you put it. The core kit for most trail runs is simple: phone, keys, a form of ID, gels, a soft flask, and a lightweight jacket for longer or exposed routes.
Placement follows one rule: weight goes to the centre, and the lightest items go to the sides. A 500ml flask or a phone positioned off-centre becomes a pendulum, and that pendulum is what you feel as bounce on descents. Centring the heaviest single item, whether that is a flask or a phone, and balancing the rest symmetrically left to right keeps the belt still even on broken ground.
- Phone: zipped pocket or dedicated sleeve, centred or rear, never in an open side pocket.
- Keys and ID: smallest zipped compartment, since they rarely need mid-run access.
- Gels: spread symmetrically across front or side pockets, loaded in the order you’ll eat them.
- Soft flask: front holster where you can reach and replace it one-handed without stopping.
- Lightweight jacket: rolled tight and stashed centrally if the belt has a stretch pocket large enough.
Treat pockets as two categories: quick-access for anything used mid-run such as gels and a flask, and secure for anything you only touch at the start or end, such as keys and ID. A belt designed for gels that won’t bounce usually separates these two categories by pocket size and zip type rather than by position alone, which is worth checking before you buy.
Hydration and nutrition configuration by run duration
Capacity and fuelling strategy should match the clock, not the terrain alone. Belts suit runs under two hours or routes with frequent aid stations, and that threshold is the simplest planning rule available.
For anything under 90 to 120 minutes, a single small soft flask plus two or three gels covers most runners. Past two hours, either plan for a vest with greater capacity or map out aid-station refills in advance, since carrying enough fluid for a long unsupported effort on a belt alone becomes impractical.

Drinking to thirst is generally sufficient for many ultra-endurance scenarios where reliable refill points exist, but when refills are sparse, a planned intake schedule becomes the safer approach. On carbohydrate, guidance for ultramarathon running recommends lower intakes for shorter events and up to around 75 to 90 grams per hour for events beyond 2.5 hours, though many runners practically settle closer to 20 to 40 grams per hour.
Gels last longer when loaded in eating order rather than loaded at random. Place the first gel in the easiest-to-reach pocket and work backward through the sequence as the run progresses.
In hot or humid conditions, electrolyte concentration matters as much as volume. Sodium needs can rise beyond what standard sports drinks provide in long or hot events, so carrying a concentrated electrolyte tablet alongside gels is worth building into a belt setup for anything over an hour in the heat.
Three practical setups:
- 60 to 90 minutes: one small soft flask, two gels, no electrolyte tablet needed in mild conditions.
- 2 to 3 hours: one 500ml soft flask, four to five gels spaced by time, one electrolyte tablet.
- Supported race with aid stations: minimal belt load, refill at each station, carry only enough fuel to bridge the gaps.
A comparison of hydration vests and belts is worth reading before a longer or hotter event, since the choice between the two shapes everything from gel count to flask size.
Anti-bounce techniques and material choices
Fit solves most bounce, but materials and strap geometry solve the rest. Using grip materials and testing with a short run are both part of a proper anti-bounce setup, not optional extras.
Look for silicone grip strips on the inside of the strap, which hold position against skin far better than bare fabric. A wide, flat chassis across the lower back distributes pressure and resists twisting better than a narrow strap. Compression-style fabrics that sit tight without digging in also help the belt move with your body rather than against it.
- Tuck excess strap through the keeper loop so it doesn’t flap or shift the balance point.
- Use V-strap or dual-anchor designs where available, since they resist rotation around the waist better than a single strap.
- Clip bottle holsters tight against the chassis rather than letting them hang loose from a single attachment point.
Pro Tip: If a belt still bounces after a correct fit and centred load, the problem is usually the vessel, not the strap. Switch to a vest once total carried weight regularly exceeds what one centred flask and a few gels can hold.
For preventing chafe from belt contact points, a snug, well-centred fit does most of the work, but a thin layer of anti-chafe balm on the usual pressure points is a sensible backup on long or hot runs.
Test and tweak: short-run checklist and troubleshooting
Never wear a new belt setup for the first time on race day. A short run reveals every problem a standing fit check misses.
- Pack the belt exactly as you plan to race or train, including full flasks and the correct gel count.
- Run 15 to 20 minutes at normal pace, including one incline if possible, to simulate real motion.
- Watch for upward migration, side-to-side swing, or any single item knocking against your hip.
- Stop and retighten once if the belt has loosened, then continue to confirm the new setting holds.
- Note which pocket felt awkward to reach and swap placement before the next run rather than the next race.
On longer runs, re-check the fit roughly every 45 to 60 minutes, since fluid loss from flasks and sweat both change how the belt sits as the run goes on.
STRYQ testing notes and product fit: how our kit supports this setup
We build our soft flasks around the same anti-bounce logic covered above: a flat profile that sits close to the body, a wide base that resists shifting inside a belt holster, and a grip-friendly surface that stays put when wet. The STRYQ 500ml Running Soft Flask is sized to match the hydration windows most belt-based runs call for, whether that is a single-flask setup under two hours or one flask within a larger multi-pocket load.
Every product we release goes through repeated sample revisions and real-run testing before launch, which is how we settle on shape and capacity rather than guessing at what fits a typical belt holster.
Author perspective: practical priorities when setting up a belt for trail runs
Fit beats features every time. A £32 belt sized and loaded correctly beats a premium model worn too high or packed off-centre. We’d rather see a runner spend ten minutes on a short test run adjusting strap tension and pocket placement than spend money chasing a different belt entirely. Test on easy terrain first, note what moves, fix it, then take the same setup uphill.
— martin
Carrying hydration that stays put: our soft flasks for belt setups
Our soft flasks are built flat and wide rather than round, which matters once a flask sits inside a belt holster rather than a hand. That shape keeps the centre of gravity low and close to the hip, which is exactly what the anti-bounce advice above depends on.

We offer the STRYQ 500ml Running Soft Flask in black, alongside pink and purple versions, each priced at £14 on our website. They pair naturally with our running belts and hydration vests, and our full soft flask range covers the capacities most belt setups call for. If your current belt setup still bounces no matter how you pack it, it may be worth reviewing shoe fit too: an uneven gait from poor shoe selection can throw off hip-level stability as much as a loose strap. Browse the collection and fit a flask to your own belt before your next long run.
FAQ
How tight should a running belt be for trail running?
A running belt should allow two fingers to slide under the strap with light resistance once fastened, sitting low on the hip bones rather than the natural waist. Fasten it slightly firmer than feels comfortable standing still, since running motion loosens the fit within the first kilometre.
Where should I place a soft flask on a running belt?
A soft flask belongs in a front holster where you can reach and replace it one-handed without stopping, ideally centred or balanced by an item of similar weight on the opposite side. Off-centre placement is the most common cause of bounce on descents.
Should I use a belt or a vest for long trail runs?
Belts suit runs under two hours or races with frequent aid stations, while longer or unsupported distances generally call for a vest with greater fluid capacity. Terrain matters too, with technical or slow trails favouring a vest regardless of distance.
How often should I drink and fuel during a trail run?
Drinking to thirst works well for many ultra-endurance scenarios where refill points are reliable, while sparse refills call for a planned intake schedule instead. For carbohydrate, guidance for longer events over 2.5 hours suggests rates up to around 75 to 90 grams per hour, though many runners manage comfortably on less.
How do I stop my running belt from bouncing?
Centre the heaviest item you carry, fit the belt low and snug using the two-finger rule, and test the full setup on a short run before race day. Grip materials and a flat chassis also reduce bounce compared with a narrow strap with no grip lining.
Sources
- How should you carry your hydration? — ATRA
- PMC review on drinking to thirst in ultra-endurance contexts
- How to Set Up Your Running Belt for Zero Bounce - The Girl That Runs