A correctly fitted hydration vest sits snugly against your torso like a second skin, with minimal bounce and no restriction to your breathing. Measure your chest circumference first, choose a closer fit for speed sessions and a slightly roomier one if you’ll layer or carry more, then load the vest and run for 20 to 30 minutes before you trust it on race day.
TL;DR:
- Measure your chest at the widest point and compare it to the brand’s specific size chart to ensure a proper fit.
- Load the vest with gear similar to race conditions and adjust straps gradually, checking for stability during movement.
- For longer or heavier loads, select a size that accommodates extra volume without straps maxing out or riding up.
- Recheck torso length to prevent the vest from riding up or digging in, especially if you experience ride-up or chafing.
- Women-specific vests often provide better comfort and less rubbing, especially at the collarbone and shoulders.
Table of Contents
- How to measure yourself for hydration vest sizing
- How to adjust and fit your vest step by step
- How packing and your hydration system change the fit
- Fixing bounce, ride-up, chafing, and breathing problems
- What to expect from STRYQ’s hydration vest range
- Should you fit for speed or for capacity?
- Try a STRYQ vest built around this exact fit process
- Sources
- FAQ
How to measure yourself for hydration vest sizing
Getting the right hydration vest size starts with a tape measure, not a guess based on your T-shirt size. Chest circumference is the number that matters most. Wrap the tape around the widest part of your chest, under your arms and across your shoulder blades, keeping it level and snug without compressing your ribs. This single measurement usually governs vest sizing more reliably than height, weight, or the size you wear in casual clothing.
Torso length matters too, particularly for how the vest sits once loaded. Measure from the top of your sternum down to roughly your lower ribs or upper abdomen, since that’s the zone most vests are built to span. A vest that’s right for your chest but wrong for your torso length will still ride up or dig in.
Checking your number against a brand’s own size chart is non-negotiable, because sizing runs differently across manufacturers. The Trail Sisters guide to fitting a hydration vest recommends measuring at the widest point and cross-checking that figure against the brand’s chart rather than assuming sizes are universal. A general sizing reference like Capra Sports’ guide is also useful if you want a second method for taking accurate body measurements before you buy.
If your number sits between two sizes, size down for a snugger, more stable fit unless you know you’ll need extra layers underneath. And if your straps are already at the extreme ends of their adjustment range once fitted, that’s a clear signal you’ve picked the wrong size, not a fit you need to fight.
- Measure chest circumference at the widest point, tape level.
- Measure torso length from sternum to lower ribs.
- Compare both numbers to the brand’s specific size chart.
- Treat maxed-out straps as a sizing error, not a fit to persevere with.
Pro Tip: Measure in the kind of top you’ll actually run in, not bare-chested. A thin base layer changes the number just enough to matter on a borderline size.
How to adjust and fit your vest step by step
Fit testing an empty vest tells you almost nothing useful. Load it exactly as you’ll run with it, flasks full, pockets packed, before you touch a single strap. An empty vest fit and a race-day loaded fit behave differently, and the whole point of this exercise is to replicate the second.
- Clip the sternum straps first and centre them on your chest, starting from the mid-point of their adjustment range rather than fully loose or fully tight.
- Tighten the side and lower cinches to anchor the vest against your torso, pulling evenly on both sides.
- Check the shoulder straps lie flat with no twisting, and confirm you can still reach your front pockets without straining.
- Jog on the spot, then run a short loop, changing direction and reaching for a flask mid-stride to see where the vest moves.
- Note any bounce, rubbing, or pinching, and make one adjustment at a time before repeating the test.
Starting from the mid-point of the strap range isn’t arbitrary. The 8lines guide to running hydration vest fit notes that if you find yourself having to fully tighten every strap just to get a secure fit, the vest is probably too large for your frame, regardless of what the size chart said. Leave room to tighten further as the day gets hot or your load changes, rather than starting maxed out.
Pro Tip: Do your dynamic check on the actual surface and pace you’ll race on. A vest that feels fine on a flat, easy jog can bounce noticeably on a rocky descent at speed.
How packing and your hydration system change the fit
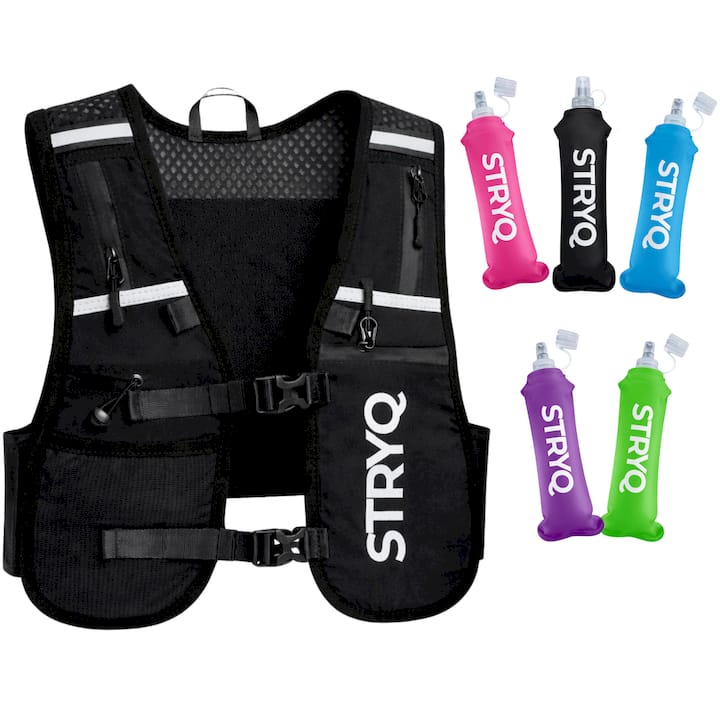
What you carry, and where, has as much influence on comfort as the vest’s cut. Soft flasks compress as you drink from them, which keeps front carry stable and steadily lighter as a run goes on. Rear reservoirs behave differently: they hold their shape and volume until nearly empty, shifting your centre of gravity backwards and demanding a tighter anchor to stop that weight swinging. REI’s guide to choosing a running hydration vest points to snug, well-anchored carry as the standard manufacturers build towards, precisely because a loose rear load is the main source of unwanted movement.
Packing distribution matters as much as the hydration format you choose. Keep heavier items, gels, a phone, a spare layer, close to your spine rather than bulking out the front pockets, and balance weight evenly between left and right. Overstuffing a rear pocket high up is one of the most common causes of sway, according to Kit Authority’s hydration vest guide.
- Short runs: minimal load, one or two soft flasks, nothing in the rear.
- Mid-distance: balanced front and rear, heavier items near the spine.
- Long days or fastpacking: higher capacity but still packed compact, not high and loose.
Fixing bounce, ride-up, chafing, and breathing problems
Most fit complaints trace back to one of four issues, and each has a specific fix rather than a general “tighten everything” response.
- Front bounce: tighten the sternum straps and side cinches first. If they’re already maxed out, rebalance your front pockets or drop to a smaller size.
- Rear bounce or ride-up: the vest is likely too long for your torso, or the hip and waist anchor needs tightening. Recheck your torso length measurement before assuming it’s a strap problem.
- Shoulder rubbing or pressure: reduce the load sitting on the shoulder panels, redistribute weight lower, and confirm the panels sit flat rather than bunching.
- Restricted breathing: loosen the front compression straps slightly. If breathing still feels tight even loosened, the vest itself is undersized for you.
A useful diagnostic worth running through on every fit check: load the vest, tighten it as you normally would, then jog. If the pack shifts more than around half an inch during that jog, according to Kit Authority’s fit advice, that’s your cue to adjust further or reconsider the size rather than accepting it as normal.
Women-specific cuts exist for a reason here too. They’re typically shorter in the front and narrower through the shoulders, which reduces rubbing and improves reach to front pockets, a point the Trail Sisters fit guide makes clearly. If you’re finding a unisex vest chafes at the collarbone or rides too high at the front regardless of size, a women-specific cut is worth trying before you assume it’s your size that’s wrong.
What to expect from STRYQ’s hydration vest range
Some hydration vest ranges include adjustable sternum straps that start comfortably in the mid-range, stretch side panels that move with your torso rather than against it, and pocket placement designed for reach without twisting your shoulder. The goal is a vest that does the job of anchoring your load without you fighting the straps every kilometre.
Before any run that matters, run through this checklist:
- Measure chest and torso, then check against the STRYQ size chart.
- Load the vest with a soft flask or a hydration vest bottle, whichever suits your carry preference.
- Fit test loaded for 20 to 30 minutes on a route similar to what you’ll actually run.
- Adjust one strap at a time and repeat the test until the movement disappears.
Pro Tip: Test with both a soft flask and a hard bottle if you own both. The way each sits in the front pocket changes how the vest balances, and one option will suit your stride better than the other.
Should you fit for speed or for capacity?
Tighter fits win for tempo runs and short road efforts where low bounce matters more than storage. For a half marathon, a slightly looser front lets you fit layers without sacrificing stability. Once you’re into ultramarathon or fastpacking territory, prioritise a size that handles extra volume comfortably over one that’s merely snug empty.
— martin
Try a STRYQ vest built around this exact fit process
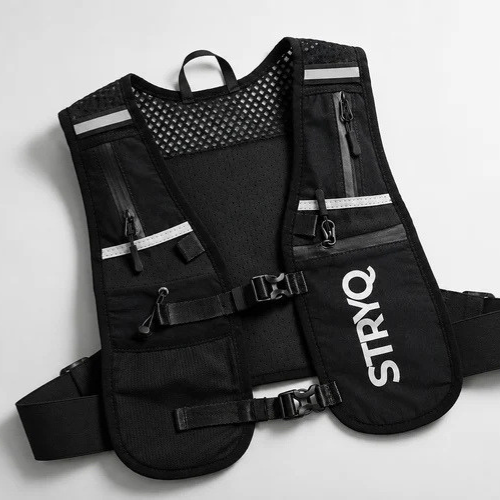
Stryq designs its vests to solve the fit problems this article just walked through, not to add another decision to your kit bag. The STRYQ hydration running vest suits short and mid-distance runs where a close, low-bounce fit matters most, with strap adjustment built to sit near that mid-point range from the first wear. Pair it with the STRYQ 500ml running soft flask for front-pocket carry that stays stable as you drink, or the STRYQ Green 500ml hydration vest bottle if you prefer a structured bottle over a flask.
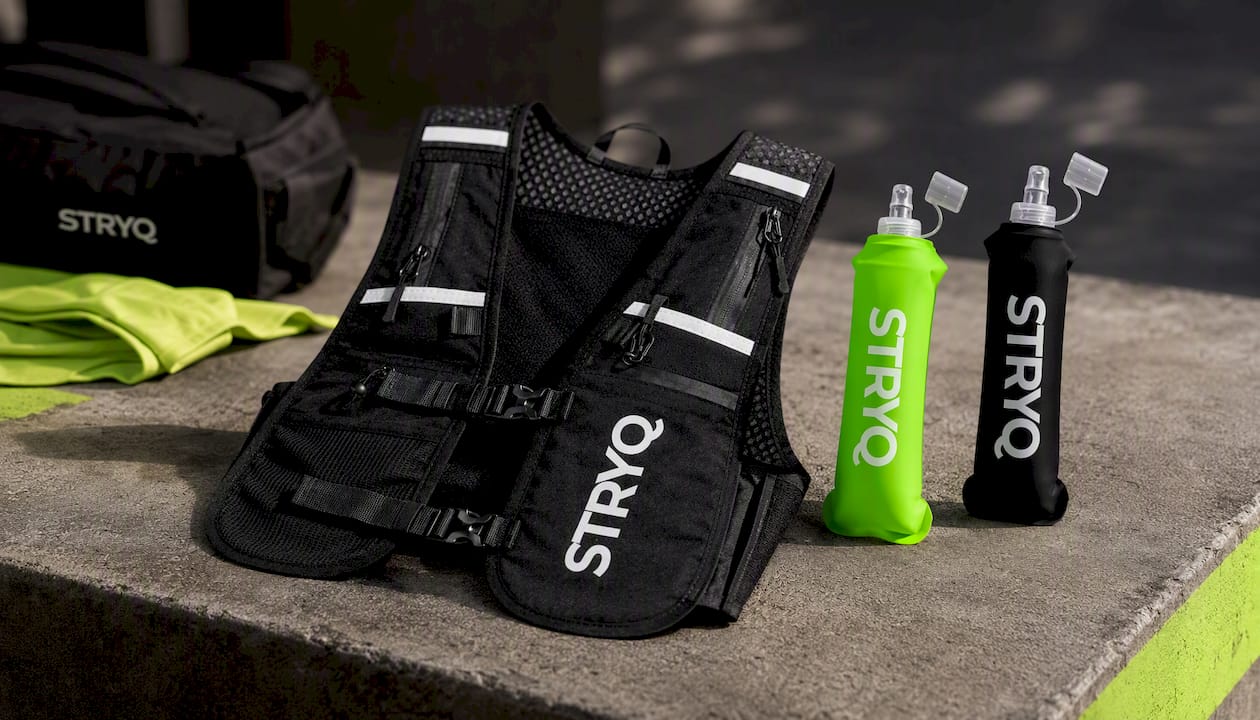
Whichever setup you choose, load it exactly as you’ll race and run 20 to 30 minutes before you commit to it on the day, priced in pounds sterling with straightforward returns if the fit isn’t right first time.
Sources
For deeper detail beyond this guide, Trail Sisters’ fitting piece covers gender-specific cuts in more depth, REI’s buying guide explains hydration system trade-offs, and Kit Authority’s guide breaks down load placement further.
- Running Hydration Vest Fit Done Right
- How to Fit Your Hydration Vest | Trail Sisters®
- How to Choose a Running Hydration Vest | REI
- How to choose a hydration vest | Kit Authority
FAQ
Should you size up or down in a hydration vest?
Size down if you’re between two sizes and running fast or unloaded, since a snugger fit reduces bounce; size up only if you need room for layers or a heavier long-distance load.
How do I know what size hydration vest to buy?
Measure your chest circumference at its widest point and check that number against the specific brand’s size chart, since sizing varies significantly between manufacturers.
Are hydration vests worth it for running?
Yes, for runs of longer duration or without reliable water access, a well-fitted vest carries fluids and nutrition far more stably than a handheld bottle or belt. Our hydration vest versus belt comparison breaks down when each makes more sense.
Is a running vest supposed to fit tightly?
Yes, a running vest should feel snug against your torso with straps at their mid adjustment range, not loose. If you can’t tighten it further because the straps are already maxed out, the size is wrong rather than the fit itself.