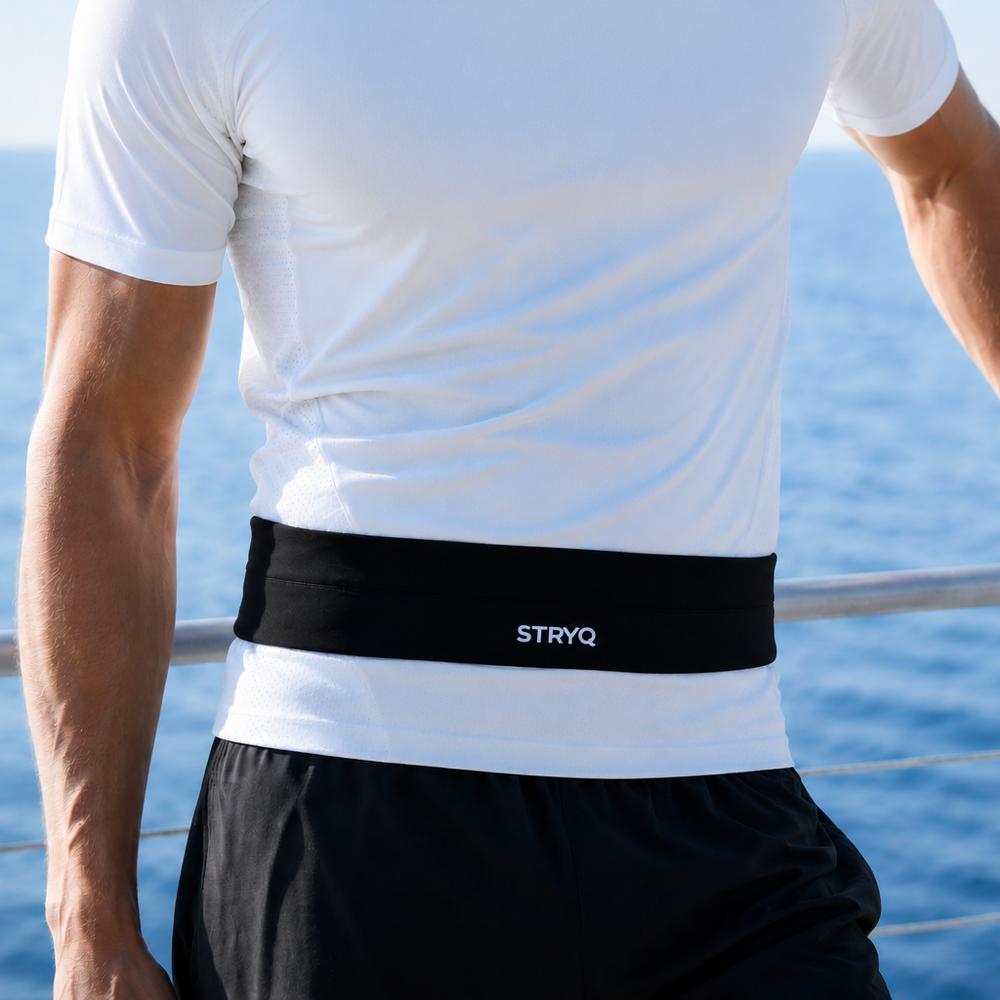
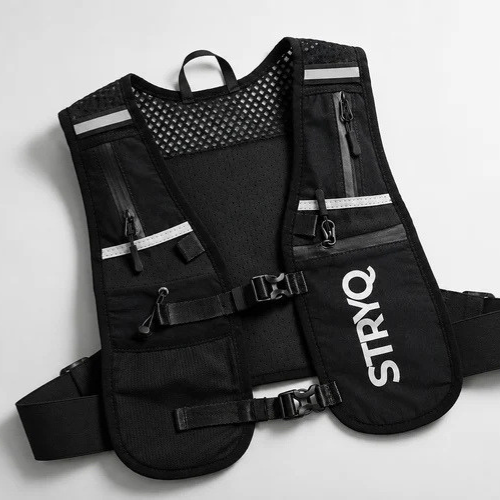
A running belt should feel snug but not restrictive: fitted over your usual running kit with roughly a two-finger gap when standing still. It should lie flat against your lower back or hips without bouncing, twisting or creeping upwards. The immediate move is simple. Measure over what you’ll actually train in, tighten it a touch more than feels comfortable standing, then confirm on a short test run before you trust it on race day.
TL;DR:
- A properly fitting belt should sit snugly over your training clothes, with a two-finger gap, and remain flat without bouncing or shifting during runs.
- Measure waist over your actual running kit to ensure size accuracy, favoring smaller sizes for stretch belts and larger for adjustable designs if in between.
- Placement varies by load: lower on hips for light gear and longer runs, or higher near the waist to carry heavier items like a phone, considering your body shape and arm swing.
- Achieving zero bounce depends on correct tensioning just beyond standing comfort and load distribution centered on your back or hips.
- Testing belt fit on familiar routes with varied effort levels and retightening after initial minutes drastically improves stability and comfort during long-distance runs.
Table of Contents
- Why a proper running belt fit matters more than you think
- How do you measure for a running belt and pick the right size?
- Where should you wear a running belt for different runs?
- How do you eliminate belt bounce once it’s on?
- Which materials and features actually keep a belt in place?
- How do you fix a belt that slides, creeps or chafes?
- How Stryq designs belts around a fit-first philosophy
- What I’ve learned testing running belts that most guides skip
- Get a belt built around the fit rules in this guide
- Sources
Why a proper running belt fit matters more than you think
Poor fit isn’t just an annoyance you tolerate for the sake of carrying your phone. It changes how you run. Clinical and biomechanics research links excessive torso motion and uneven external load to inefficient movement patterns and higher perceived exertion during running. In plain terms, a belt that shifts and bounces forces your core and arms to compensate, and that compensation costs energy you’d rather spend on pace.
Chafing tells a similar story. Skin irritation is almost always caused by relative motion, fabric rubbing against skin repeatedly over a run rather than staying still. A belt that slides even a centimetre with every stride creates exactly that friction. Runners active on forums like Runners World’s community boards consistently report the same fix: once tension and position are dialled in, the belt effectively disappears.
That word, “disappears,” comes up again and again in runner feedback, and it’s the standard worth chasing. A stable belt lets your arm swing stay natural instead of subtly guarding against a bag of gels sliding off your hip.
What good fit actually protects against:
- Bounce and shifting that break your rhythm and drain focus over longer distances.
- Chafe points where fabric edges repeatedly rub the same patch of skin.
- Compensatory torso rotation that quietly increases effort without you noticing until mile eight.
- Pocket contents pulling the belt off-centre and tugging at your hips with each stride.
Pro Tip: If you finish a run more aware of your belt than your pace, the fit wasn’t right, not the belt itself. Adjustment almost always solves it before a size swap does.
How do you measure for a running belt and pick the right size?
Measure over the clothing you’ll actually run in, not your bare waist. A belt that fits perfectly over a T-shirt can feel completely different over a thermal layer or leggings with a high waistband, and that gap is where most sizing mistakes happen.
Start by locating where you actually want the belt to sit, whether that’s your natural waist or lower on your hips. Wrap a fabric tape measure around that exact spot, over your running kit, pulling it snug but not compressive. You want the tape resting against your body the way the belt will, not cinched like a corset. Record the figure in both inches and centimetres, since sizing charts vary between brands.
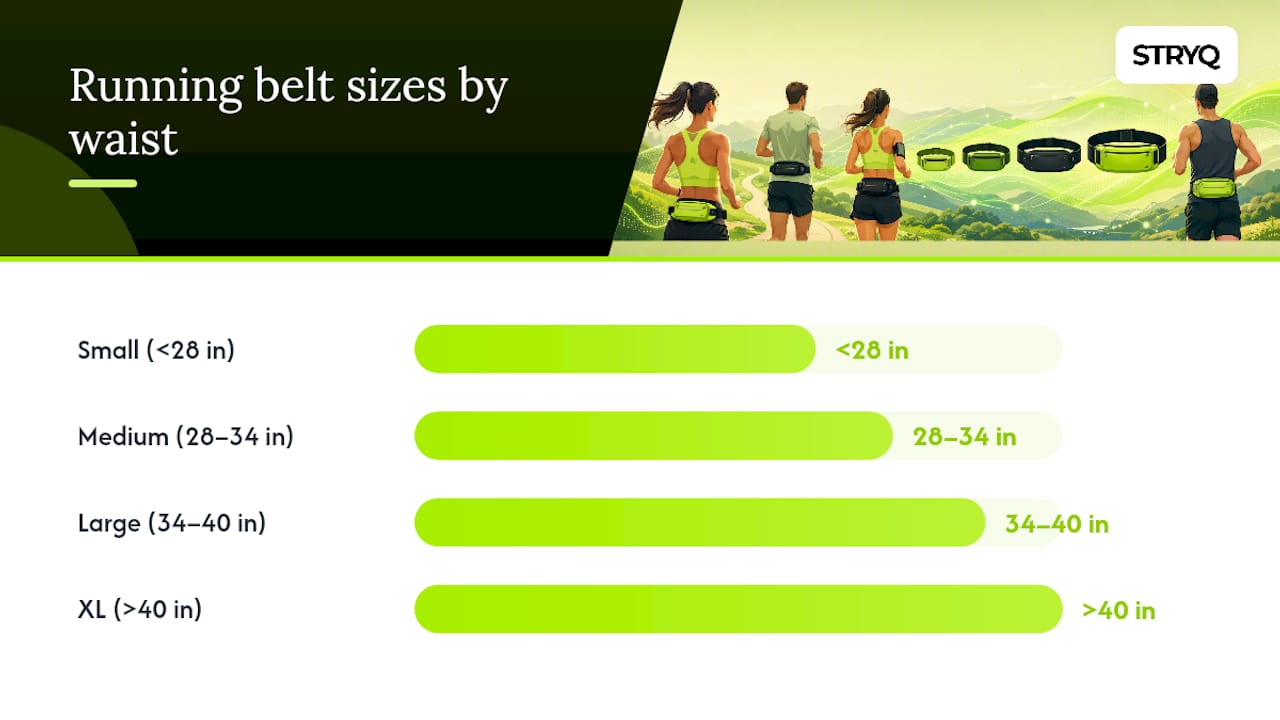
If your measurement lands between two sizes, the decision depends on the belt’s construction. High-stretch elastic belts should be sized down, because the fabric will give more once you’re moving and a “true to size” choice often ends up loose within the first mile. Belts built around adjustable straps or toggles are more forgiving. Choose the larger option there and dial in the fit with the adjuster. This lines up with what field reviewers see repeatedly: sizing guides that measure over running clothing, and a bias toward sizing down on stretch fabric, consistently produce a better, more stable fit.
A rough sizing band, based on typical belt construction, looks like this:
| Waist measurement (over kit) | Typical size | Notes |
|---|---|---|
| <28 inches | Small | Sits close; check for a two-finger gap |
| 28 to 34 inches | Medium | Most common band for adjustable belts |
| 34 to 40 inches | Large | Confirm elastic still has stretch reserve |
| >40 inches | Extra Large / adjustable | Favour strap-adjustable designs |
Treat your body as the variable here, not the belt. Veteran runners routinely choose the smaller of two close sizes on stretch belts precisely because compression, not slack, is what keeps a belt in place over a long run. STRYQ’s own running belt size guide walks through this measurement process step by step if you want a second reference point before committing.
A few sizing habits worth building in before you buy:
- Measure at the end of a run, not first thing in the morning, since torso volume shifts slightly with hydration and activity.
- Recheck your size if you’ve changed running kit significantly (winter layers versus summer vests).
- Never round up “just to be safe”: a loose belt fails faster than a snug one ever will.
Where should you wear a running belt for different runs?
Hip placement and natural waist placement solve different problems, and the right one depends on what you’re carrying and how far you’re going.
Wearing the belt lower, around the hips, tends to interfere less with breathing and reduces the chance of it riding up into your ribs on longer efforts. It suits light loads well: keys, a card, a gel or two. The trade-off is that hip placement sits closer to your stride mechanics, so a poorly tensioned belt is more likely to shift with hip rotation.
A higher position, closer to your natural waist, gives a flatter, more stable base for heavier loads like a phone, a soft flask, or a small first-aid kit. It keeps weight closer to your centre of mass, which is exactly why long-distance runners tend to favour belts with centralised phone pockets rather than side-loaded designs. The downside is that a badly fitted belt sitting higher can dig in when you breathe deeply during hard efforts.
Body shape and arm swing both play into this too. Runners with a shorter torso often find natural-waist placement crowds their diaphragm, while runners with a more pronounced hip curve sometimes find hip placement slips more easily without a contoured shape to grip. Wide arm swing, common in faster running, can also catch on a belt that sits too high and too loose.
Race-specific belts, built to be minimal, often work best at the natural waist where bulk is least noticeable. Hydration belts carrying bottles or flasks can sit slightly lower without the same interference concerns since the added weight is more evenly spread.
Quick checks worth running through before committing to a spot:
- Jog 200 metres at your usual pace and note whether the belt shifts up or down.
- Breathe deeply for ten strides. If the belt digs in, move it half an inch and retest.
- Swing your arms as you would mid race. Catching fabric means the position or size needs adjusting.
How do you eliminate belt bounce once it’s on?
Bounce almost always comes down to two things: starting tension and item placement, in that order. Fix tension first, because no amount of clever packing rescues a belt that was never tight enough to begin with.
-
Tighten a notch beyond standing comfort. A properly fitted belt should feel snug but not restrictive, and slightly tighter than what feels natural when you’re standing still, because elastic and straps relax once you’re moving. What feels borderline too tight at rest is usually right once you’re a few minutes into a run.
-
Load the centre first. Put your phone, your heaviest single item, in the central pocket or at the small of your back. Weight sitting dead centre doesn’t create a pendulum effect the way side-loaded weight does.
-
Push lighter items to the sides. Gels, a key, a small pack of tissues: these balance the belt rather than unbalance it, because distributing weight this way keeps the load symmetrical around your body.
-
Use any anti-slip liners or silicone panels fitted to the belt. These grip your kit or skin directly and do far more work than tension alone on hot, sweaty runs when fabric-on-fabric grip drops off.
-
Walk first, then jog easy, then add short accelerations. Each stage exposes a different kind of movement. Walking reveals gross slippage, easy jogging reveals rhythmic bounce, and short bursts reveal whether the belt holds under a sudden change of pace.
-
Re-adjust between stages, not just at the end. If the belt has crept even slightly during the walk, fix it before you jog. Small drifts compound over a longer run rather than correcting themselves.
Pro Tip: Test a new belt on a run you know well, ideally one with a hill or a sprint finish. Flat, easy runs hide fit problems that only show up under load or effort.
Small position changes matter more than most runners expect. Moving a belt an inch higher or lower can be the difference between constant bounce and a belt you genuinely stop noticing, which is why the test-run stage isn’t optional. It’s the actual fitting process, not a formality after you’ve already decided the size is right.
Which materials and features actually keep a belt in place?
Not all “adjustable” belts adjust the same way, and the difference matters more than most product descriptions let on.
Elastic and compression panels work by stretching to fit and then gripping through tension, which suits runners who want to pull a belt on and go without fiddling with straps mid run. Strap-based systems with buckles or toggles offer more precise control, letting you fine-tune tension after you’ve already started moving, something pure elastic can’t do. Recent gear roundups consistently point to belts combining both: enough stretch to feel comfortable, enough adjustability to stay stable as conditions change over a long run.
Width and shape matter as much as the fabric itself. A narrow belt concentrates pressure into a thin band, which is exactly where hot spots and chafe tend to start. A wider, contoured belt spreads that same tension across more skin and is far less likely to roll or twist, particularly on runners with a less pronounced waist curve.
Pocket design deserves more attention than it usually gets. A single large rear pocket keeps weight central but can be awkward to access mid stride. Multiple smaller pockets, distributed around the belt, make items easier to reach but only stay balanced if you actually load them evenly, as covered above.
A few features worth specifically testing before you commit to a belt, not just reading about:
- Anti-slip silicone strips or grippy internal linings, which matter far more on sweaty summer runs than dry winter ones.
- Toggle or quick-adjust closures, which product reviews link to holding tension better over long runs than a simple strap-and-buckle setup.
- Reflective detailing or loops for lights, useful but never a substitute for a genuinely secure fit.
- Seam placement, since a seam sitting directly over a pressure point will chafe regardless of how good the overall fit is.
STRYQ’s breakdown of running belt materials goes further into fabric weights and lining choices if you want to compare options before buying, and the brand’s guide to choosing a belt that stays put covers how these features interact in practice.
How do you fix a belt that slides, creeps or chafes?
Sliding and creeping are different problems with different fixes, and confusing the two leads to the wrong solution.
A belt that slides down tends to mean the overall tension is too loose, or the belt sits on a part of your body without enough shape to grip against. The fix is usually tightening a full notch, not a fraction, and reassessing position if tightening alone doesn’t hold. A belt that creeps upward, by contrast, usually points to a placement issue: it’s sitting where your torso narrows as you breathe and move, so it rides up on its own regardless of tension. Moving it half an inch lower, onto a slightly wider part of your hip or waist, often solves this faster than any amount of extra tightening.
Chafing responds well to three separate levers, and it’s worth trying them in order rather than all at once so you know what actually worked. Clothing choice comes first: a snug base layer under the belt removes a lot of the fabric-on-skin friction that loose tops create. Repositioning comes second, since even a small shift away from a known hot spot changes the contact pattern entirely. Anti-chafe balm is the third lever, useful as backup but not a substitute for fixing tension or position. STRYQ’s guide on preventing belt chafing covers this in more detail, and pairing a well-fitted belt with the right base layer, something Breevar’s sweat-tested sock and apparel research touches on for reducing friction generally, closes most of the gap.
Elastic doesn’t last forever. If a belt that used to feel snug now sits loose at the same setting you always used, the elastic has lost its recoil and no amount of retightening straps will restore it. That’s a replace, not adjust, situation.
A short maintenance routine keeps a good-fitting belt good for longer:
- Hand wash or use a gentle machine cycle, since harsh detergent and high heat degrade elastic faster than regular running sweat does.
- Air dry rather than tumble dry. Heat is the main cause of premature elastic breakdown.
- Store flat or loosely rolled rather than folded tightly along the same crease every time, which weakens fabric at that line.
- Check anti-slip linings periodically. Grip coatings wear down before the fabric itself does.
How Stryq designs belts around a fit-first philosophy
Fit problems described throughout this guide, bounce, creep, chafe, uneven load, are the exact list Stryq starts from when developing a belt, not an afterthought bolted on after the design is finished. The brand’s product development runs through multiple sample revisions and testing rounds with everyday runners before anything reaches production, with the aim of solving comfort and stability issues rather than just adding storage.
That process shows up in specific choices. Stretch panels are positioned where the body flexes most during running, not just where fabric is cheapest to cut. Anti-slip elements sit at the points most likely to see movement, hips and lower back, rather than spread evenly regardless of where slippage happens. Storage is arranged around the same centre-of-mass principle covered earlier: keep the heaviest item close to your spine, not swinging at your side.
What that translates to for a runner choosing a belt:
- 360° storage means pockets are distributed around the belt rather than clustered in one bulky rear pouch that pulls unevenly.
- Stretch panels combined with adjustable elements give both the pull-on convenience of elastic and the fine control of a strap system.
- Anti-slip detailing targets the same hot spots this guide has flagged as the usual sources of chafe and creep.
| What matters for fit | Why it matters | How it’s addressed |
|---|---|---|
| Even weight distribution | Prevents bounce and hip pull | 360° pocket layout |
| Consistent tension | Stops upward creep | Stretch and strap combination |
| Skin contact points | Reduces chafe risk | Positioned anti-slip panels |
If you’re still working out your size, the running belt size guide walks through the same over-the-kit measurement method covered earlier in this article, applied specifically to Stryq’s own sizing bands.
What I’ve learned testing running belts that most guides skip
Two tricks consistently separate a belt that disappears from one you fight with for ten kilometres. The first is retightening after the first five minutes, not before you start. Elastic and straps settle once your body heat and movement kick in, so whatever felt right standing in your kitchen is almost never right by kilometre two. The second is testing on a route you already know intimately, ideally with a hill or a hard surge near the end, because flat, easy running hides exactly the fit flaws that show up under load.
The mistake I see most often isn’t choosing the wrong belt. It’s choosing the right belt and then never actually testing it properly before relying on it. Runners tighten a belt once, standing still, and assume that setting holds for every run afterwards regardless of clothing layers, temperature or how full the pockets are.
One rule I’d genuinely call non-negotiable: never wear a brand-new belt for the first time on race day. Break it in on at least two or three training runs first, at different paces, so you know exactly how it behaves under pressure rather than finding out at mile ten of an event you can’t restart.
— martin
Get a belt built around the fit rules in this guide
Every fitting principle covered here, snug-not-restrictive tension, centred weight, anti-slip contact points, is the actual design brief behind the STRYQ RUNNING BELT. Rather than a generic pouch with straps bolted on, it’s built with 360° storage to keep weight distributed evenly, stretch panels tuned for the two-finger fit standard covered earlier, and anti-slip detailing positioned exactly where creep and chafe tend to start.
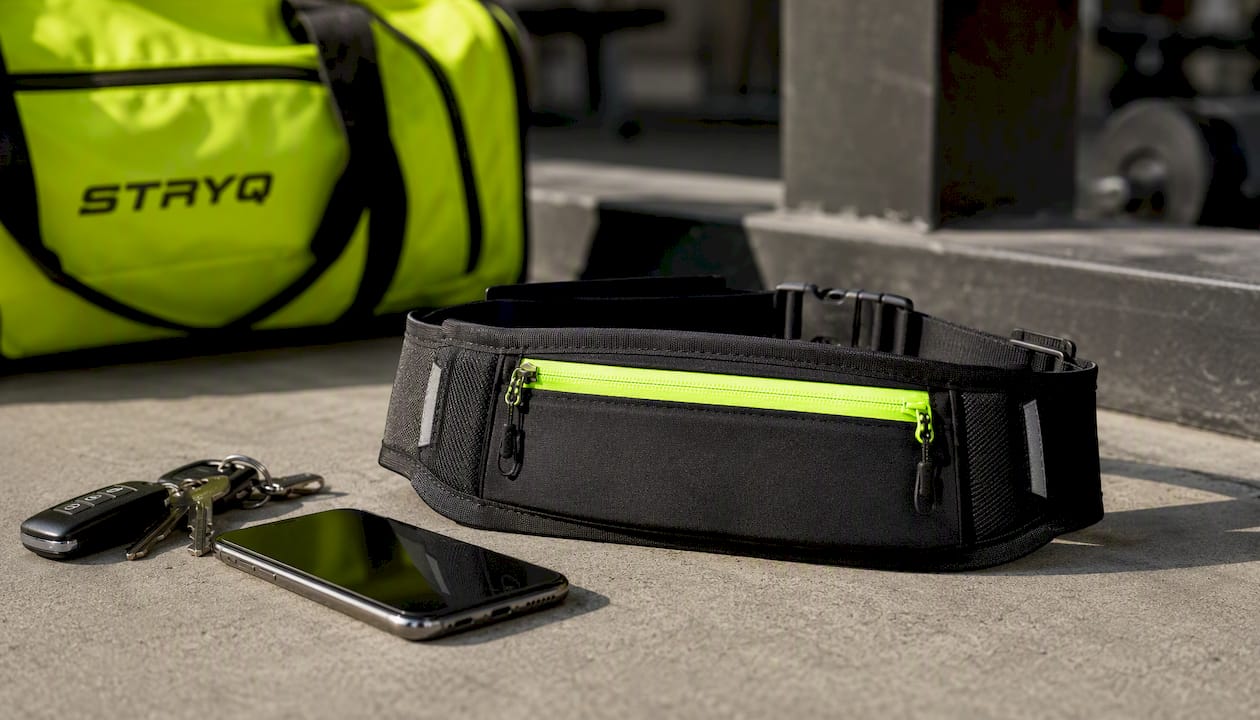
Use the belt’s size guide the same way this article recommends: measure over the kit you actually train in, size down slightly if you’re between two measurements, and confirm the fit on a short test run before trusting it on anything longer. Prices are shown in £ on the product page, with full sizing details laid out before you buy.
If you’ve been fighting bounce, chafe or a belt that slowly rotates round your hip on every run, the fix is rarely a completely different product. It’s usually the fit process this guide has walked through, applied properly. Head to the running belt product page to check current sizing and get one on order before your next long run.
Sources
A handful of sources back the fitting advice in this guide and are worth a closer read if you want the fuller detail behind any single step. Rise Endurance’s guide to wearing a running belt covers the snug-but-not-restrictive standard in depth. The Girl That Runs’ zero-bounce setup guide is the clearest breakdown of packing order available. iRunFar’s running belt roundup is useful for understanding what current gear reviewers prioritise in stability testing, and the NCBI biomechanics research referenced earlier explains the physiological cost of unstable load carriage in more technical detail than fits comfortably in a gear guide.
- Research article on biomechanics and load effects — NCBI
- Best Running Belts of 2026
- How to wear a running belt for comfort and performance — Rise Endurance LLC ®
- How to set up your running belt for zero bounce - The Girl That Runs