You can replace a bite valve in about ten minutes with no special tools. Measure your tube, buy a valve that matches it, pull the old one off (warm water helps if it is stuck), push the new one on firmly and test it for drips before you run. Most of the effort goes into choosing the right part, so start there.
This guide covers the whole job for runners: how to tell which valve fits, how to remove the old one, how to fit the new one and its sheath, how to check for leaks, what to do when something sticks, and how to keep the new valve clean so it lasts.
TL;DR
- Check the tube before you buy: either find a valve from the same maker as your original, or measure the hose’s inside and outside diameters, as the iFixit repair guide recommends.
- Pull the old valve off by hand. If it will not move, warm water softens it and makes it easier to slide off.
- Push the new valve on until it seats fully, fit the sheath if it has one, then fill the reservoir and squeeze the tube to test.
- Leaks almost always come from a half-seated valve, a nicked tube end or a loose connector, not from the valve itself.
- Rinse and air-dry the valve after every run. That is what stops the grubby, tired feel that makes people replace valves in the first place.
Table of Contents
- When a bite valve needs replacing
- Which replacement bite valve will fit?
- What you need
- Step by step: removing the old bite valve
- Step by step: fitting the new bite valve and sheath
- Check it before you run
- If the valve is stuck or the tube needs a new connector
- Keeping the new valve clean
- Our view: why bite valves fail, and what we would do about it
- Choosing a hydration setup that avoids the problem
- Where STRYQ fits in
- FAQ
- Sources
When a bite valve needs replacing
A bite valve is a small rubber or silicone part that does one job: it stays shut until you bite it and then lets water through. Because it is the part your teeth work on every run, it is usually the first part of a hydration setup to wear out.
Replace it when you see any of these:
- A slit that no longer closes. If water seeps out when you are not biting, the valve has lost its seal. Dribbling down your chest on a long run is the typical sign.
- Tears or chew marks. A small nick at the tip can grow quickly once the valve is under pressure.
- Stiffness or a sticky, tacky surface. Old silicone and rubber change texture, and a valve that is hard to open makes you work for every sip.
- Discolouration or a smell you cannot rinse out. If it still smells after a proper wash, replace it. A valve costs very little compared with the pack it belongs to.
- A lost valve. It happens: it pings off while you are packing the car, or it never made it back from a race.
If the tube itself is cracked, cloudy or stained throughout, a new valve will only treat the symptom. In that case replace the hose or the whole reservoir. The iFixit guide makes the same point: it suggests replacing a hose before it fails completely so your pack does not turn into dead weight halfway through a route.
Which replacement bite valve will fit?
This is the step that goes wrong most often, so spend a few minutes on it. Bite valves are not one universal size. Some push onto the outside of the tube, some use an insert that goes inside it, and some connect through a quick-release fitting. Buying the wrong style is the main reason a replacement does not work.
There are two reliable ways to match a part to your tube, both from the iFixit repair guide:
- Find the same maker’s part. Look at your reservoir or the original packaging for the brand and model, then search for that brand’s replacement valve.
- Match the size. Measure the inside and outside diameter of the hose where the valve sits. A valve that suits both measurements will fit.
How to measure the tube
You need a small ruler or, better, a pair of digital callipers. Cut nothing yet. Look at the end of the tube once the old valve is off, since that is where you can measure the opening properly.
- Outside diameter: measure across the tube wall to wall.
- Inside diameter: measure the open bore. If you cannot measure it directly, compare the opening against a drill bit or a set of known rods.
- Write both numbers down before you start shopping, and compare them with the product listing.
Many hydration tubes are a common small bore, which is why generic valves exist. Even so, check the listing rather than assuming. If a seller does not state the size it fits, ask or buy from one that does.
Three styles to recognise
| Style | How it attaches | What to check |
|---|---|---|
| Push-on valve | Slides over the end of the tube, or onto an insert | Tube outside diameter, and whether an insert is included |
| Valve with sheath | A rigid valve body with a separate soft sleeve you bite | Whether the sleeve is sold separately, so you can replace only the worn part |
| Quick-release valve | Clicks onto a connector fitted to the tube | Whether your tube already has the matching connector |
If your valve has a separate sheath and only the sheath is worn, buy just the sheath. It is cheaper and quicker, and you leave the working part of the valve alone.
What you need
- The new bite valve, and a sheath if your style uses one
- A bowl or mug of warm water
- A clean towel
- Scissors or a sharp craft knife, only if the tube end is damaged
- A little mild soap
- Your reservoir, to test with water afterwards
That is the lot. There is no need for glue, clamps or tape, and adding any of them usually causes problems later.
Step by step: removing the old bite valve
- Empty and dry the tube. Drain the reservoir and blow or shake the tube out so you are not working with water running down your wrist.
- Disconnect the tube from the reservoir if it is detachable. It is easier to hold a loose tube in both hands.
- Grip the tube, not the valve. Hold the tube just behind the valve with one hand and the valve with the other.
- Twist and pull. A gentle back-and-forth twist breaks the grip before you pull. If the valve comes off, you are done with this step.
- Use warm water if it resists. The iFixit guide suggests that putting the valve and the end of the hose in a bowl of boiling water can make it easier to pull off. Warm water from a kettle that has cooled for a minute is a more comfortable way to work. Take care with any hot water, hold the tube by the dry end and let it cool before you handle the valve with bare fingers.
- Dry the tube end and look at it closely.
Inspect the tube end
Before you fit anything, check the last centimetre of the tube. It should be round, smooth and clean. If it is crushed, split or has a rough edge from a previous removal, trim it square with a sharp blade or scissors. Take off only what you need, because a shorter tube changes how it reaches your mouth. If you are not sure how much spare length you have, hold the tube against your pack and see how far it reaches before you cut.
Step by step: fitting the new bite valve and sheath
- Wet the tube end slightly. A drop of water or a little soapy water helps the valve slide on. Do not use oil, grease or lubricant sprays on anything that goes in your mouth.
- Start straight. Line the valve up with the tube and push it on in a straight line. If it goes on at an angle it will bunch and not seal.
- Push until it seats. The tube should go all the way to the stop or shoulder inside the valve. A valve that is only half on is the most common cause of leaks.
- Fit the sheath, if there is one. Push the soft sleeve over the valve body or the tube, whichever your design uses, until it sits flush with no gaps or folds.
- Reconnect the tube to the reservoir, if you removed it, and check the connector clicks or screws in fully.
- Check the slit. Look at the opening. It should be a closed, clean line with no distortion.
If you are replacing a tube with a quick-release connector, make sure the connector is the same standard as the valve. Mixing standards means the parts may seem to fit but will not hold.
Check it before you run
Never make a race morning the first test. A two-minute check at the sink saves a wet, irritating run.
- Fill the reservoir with plain water and close it properly.
- Hold the bite valve upright, then hold it level and then lower than the reservoir. Look for drips at the valve and at both ends of the tube.
- Squeeze the reservoir gently. Water should stay in until you bite. If it dribbles, the valve is not seated.
- Bite and sip. Flow should come freely with a moderate bite and stop as soon as you release.
- Tug the valve lightly. It should not shift. Do not yank it, just confirm it is secure.
- Leave it on a towel for ten minutes with the valve down. A dry towel is a dependable leak detector.
- Do a short run with the pack on before you commit to a long one.
If you find drips elsewhere on the pack, the problem may not be the valve at all. Our guide to why hydration packs leak goes through the usual causes, from loose caps to worn seals.
If the valve is stuck or the tube needs a new connector
The old valve will not come off
Warm water is the first thing to try, as above. If that fails:
- Wear a thin rubber glove or use a dry cloth for grip.
- Rotate the valve a quarter turn each way before pulling, rather than pulling straight.
- Hold the tube firmly right behind the valve so you pull the valve rather than stretch the tube.
- As a last resort, cut the old valve off with a sharp blade, taking care not to nick the tube. Slice lengthways along the valve, then peel it away. You will lose a few millimetres of tube at most if you cut carefully.
A cut-off valve means a clean break from a stuck part, but it also means you need the exact right size afterwards, so measure before you cut.
The new valve slides off
This means the valve is too big for the tube, or the tube end has stretched. Re-measure. If the size is right, try the next step: dip the tube end in warm water for a few seconds so it is slightly softer, push the valve on again and let it cool in place. If it still will not hold, the valve and tube are not a matched pair.

The tube needs a new connector
If your tube does not have a fitting that suits the valve you want, you will need an adapter or a connector designed for the style, fitted onto the tube. Choose a connector made for your tube’s measured diameters, push it in fully and test for leaks in the same way as above. Many people at this stage simply buy a complete replacement hose and valve set, which removes the guesswork.
The reservoir itself has problems
A new valve on a reservoir that leaks at the seams, has a cracked cap or smells of mould will not fix your day. If that sounds familiar, our comparison of a soft flask versus a hydration bladder helps you decide whether to keep repairing or change how you carry water.
Keeping the new valve clean
A valve you bite, rinse badly and leave damp in a pack will turn unpleasant quickly. Good habits double its working life.
- Rinse after every run. Flush the tube and valve with clean water, then bite the valve a few times so water passes through the slit.
- Wash with mild soap now and then. Use warm water and a small drop of washing-up liquid, and rinse thoroughly until no soap taste remains.
- Dry it properly. Drain the tube, hang it so the valve points down and leave it open to the air. The damp, soft rubber part you bite is the hardest to dry.
- Store it dry. Do not leave a wet reservoir sealed in a bag or kit cupboard between runs.
- Use water only in the reservoir unless the maker says otherwise. Sugary drinks leave residue in a small slit and are much harder to clean out.
- Carry a spare. A spare valve weighs next to nothing and lives happily in a pocket.
At the same time, look at the rest of your kit. Foam, straps and mesh hold sweat and smell, and a washing routine is worth building. Our guide to washing a hydration vest covers it without damaging the straps.
Our view: why bite valves fail, and what we would do about it
We design running gear around problems everyday runners actually report, and bite valves are a good example of a small part that causes outsized irritation. A valve costs very little, but when it drips on mile six or tastes off, it is the one thing you think about.
In our experience there are three patterns. First, runners buy the wrong size because the packaging does not say what it fits, and the first sign is a valve that pops off on the move. Second, people leave a damp valve inside a pack for days, and it never fully recovers. Third, many runners blame the valve for leaks that are really caused by a cap, a seam or a connector.

So our advice is plain. Measure before you buy. Test at home. Keep a spare. And ask whether a bladder and tube is the right system for your running at all. For many road runs, parkruns, 10Ks and half marathons, a soft flask in a vest pocket or a belt has no tube, no valve and nothing to replace. For longer, hotter or more remote runs, a reservoir has real advantages, and then a good valve and a clean routine matter.
Whatever you carry, the principle is the same: simple, secure and easy to maintain beats clever and fiddly. That is how we judge every product before it goes on sale.
— martin
Choosing a hydration setup that avoids the problem
If your current tube setup is a regular source of frustration, it may be worth changing how you carry water rather than replacing yet another part. Here is how the options compare for everyday runners.
| Setup | Replaceable parts | Best for | Watch out for |
|---|---|---|---|
| Reservoir and tube | Valve, sheath, tube, connector, cap | Long runs, hiking, hands-free sipping | Drying the tube and valve, leaks at connectors |
| Soft flasks in a vest | Cap and nozzle | Road runs, races, trails up to a half marathon or longer | Refilling mid-run, keeping the flask snug |
| Belt with a bottle | Bottle and cap | Short to medium runs, carrying phone and keys | Weight sitting on the hips |
Our guides on vest versus belt and what size hydration pack suits you will help you choose. If you stay with a vest, fitting it without bounce makes a larger difference to comfort than any single part.
Where STRYQ fits in
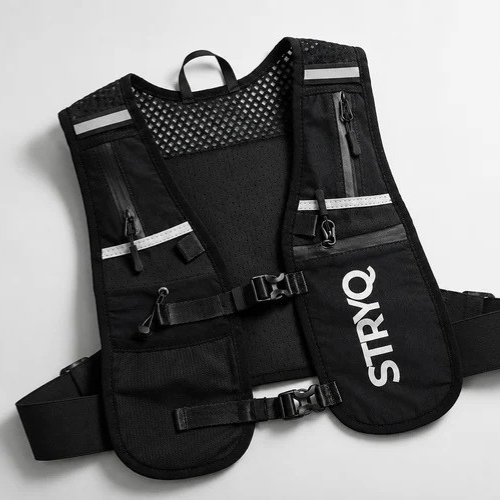
We make hydration gear for runners who want something dependable at a fair price: a hydration running vest with adjustable straps and several pockets, and a 500ml soft flask that rides in the vest’s front pockets. Each product goes through several sample revisions and quality checks, based on feedback from UK runners, before it is sold.

If you would rather carry water with no tube and no valve, browse the soft flask range or see the full running gear collection. If a flask ever drips, our guide to fixing soft flask leaks shows the quick fixes, and refilling soft flasks cleanly makes race-day stops much tidier.
FAQ
How do I know which bite valve fits my hydration tube?
Find the maker and model of your original and buy that maker’s replacement, or measure the hose’s inside and outside diameters and match them to the listing, as the iFixit guide advises. Measure after the old valve is off so you can see the real tube end. If a listing does not state what it fits, choose another one.
Can I replace just the bite valve, or do I need a new tube?
Usually you can replace the valve alone, provided the tube end is round, undamaged and clean. If the tube is cracked, cloudy, stained throughout or the end is crushed, replace the hose as well. A trimmed, square tube end is often enough to bring a worn connection back to life.
How do I get a stuck bite valve off?
Grip the tube just behind the valve, twist back and forth, then pull. If it will not move, warm water around the valve and tube end softens it, and the iFixit guide mentions a hot-water soak for this reason. Let it cool enough to handle, and cut the valve off lengthways only as a last resort.
Why does my new bite valve leak?
The most likely cause is a valve that is not fully seated on the tube. Push it on until the tube reaches the stop, and check that any sheath sits flush. If it still drips, check the tube end for nicks and the connector and cap for looseness, because the leak may be somewhere other than the valve.
How often should I replace a bite valve?
There is no fixed interval. Replace it when the slit stops closing, the rubber tears or turns sticky, or a smell survives washing. Rinsing after every run and drying it fully make a valve last far longer.