Run in fog and the kit that works is simple: a front active light, a rear red light, retroreflective bands at the ankles or wrists, and a visible torso layer. The reason two systems beat one is their redundancy. Active LEDs grab attention when ambient light is low, while retroreflective markers bounce a driver’s own headlights back at them. In fog, keep both, but drop the brightness and pick a warmer, broader beam to cut glare and backscatter.
TL;DR:
- Using a lower-mounted, warm-tone, and broader beam light reduces backscatter glare and improves visibility during foggy runs.
- Reflective ankle and wrist bands significantly increase recognition distance, often outperforming torso-only reflective gear by two to four times.
- Combining active lights with retroreflective material offers the best coverage, as they respond to different fog conditions and complement each other.
- Maintenance, such as charging fully after each run and securing straps tightly, is crucial for reliable performance in foggy conditions.
- For dense fog under 20 meters visibility, switching to steady rear lights and opting for safer routes is more effective than relying solely on lighting.
Table of Contents
- What goes into a fog running lights kit, and why each piece matters
- How do you put a fog visibility kit on correctly?
- Why less light is often better in fog
- What should you check before buying fog running lights and reflectors?
- STRYQ’s approach to building a fog-ready kit
- How do popular fog running light products actually compare?
- How do you keep wearable running lights working when you need them?
- How should your kit change with fog density?
- The overlooked mistake: chasing lumens instead of placement
- Where to get the kit that actually covers you in fog
- Sources
- FAQ
What goes into a fog running lights kit, and why each piece matters
Every item in a fog-ready kit does a different job. Strip any one out and you lose a scenario where drivers spot you.
A front light does double duty. It lets you see broken pavement, kerbs and other hazards, and it signals your presence to oncoming traffic and cyclists. In fog it needs care, because a light aimed straight ahead reflects off water droplets and throws glare back into your own eyes.
The rear red light is arguably the single most important item on this list. It is what a driver approaching from behind actually reads as “runner ahead,” and it directly influences how much room they give you when passing.
Ankle or limb reflectors do the heaviest lifting for recognition distance. Reflective strips fixed to moving joints put a signal at the point drivers’ eyes are drawn to instinctively. Research into this “biomotion” placement found recognition distances two to four times longer than typical sports kit gives you, purely from moving the reflective strip from the torso to the ankle or wrist, according to research on innovative clothing designs for night-time pedestrian safety. A separate open-road study with 120 participants found that adding ankle reflectors to a plain torso vest produced meaningfully greater conspicuity than the vest alone, and that two ankle straps offered a practical trade-off between benefit and faff, according to research on retroreflector placement and pedestrian conspicuity.
A visible torso layer, whether that’s a hi-vis vest or reflective bands across the chest and back, fills in the gap between the moving-limb signals and gives you bulk and shape a driver can identify as human rather than a stray light source.
- Front light: hazard awareness plus presence signalling, dimmed and angled to avoid self-glare in mist
- Rear red light: the main cue for approaching traffic judging distance and closing speed
- Ankle or wrist reflectors: biomotion placement, the strongest single conspicuity gain available
- Torso layer: bulk recognition, ties the whole kit together visually
Combining active lighting with retroreflective material extends visibility across more scenarios than either alone can manage, because the two respond to different conditions, according to research on active and passive lighting for warning clothing. Fluorescent fabric, worth noting, only works in daylight; once it’s dark or foggy, retroreflective material is what actually returns light to a driver’s eyes, so placement matters more than surface area.
How do you put a fog visibility kit on correctly?
Order matters more than most runners assume. Put items on in a sequence that stops one piece covering another, and check function before you leave the house, not two miles in.
- Socks and ankle straps first. These sit closest to the skin and need to be snug before anything else goes over them; consider wearing RaceKnit™ ultralight cooling crew socks to complement your fog running kit with added comfort and performance. Reflective bands kits generally go on before outer layers so the strap doesn’t shift under a jacket cuff.
- Lower-mounted lights next, on a belt or waistband. A running belt gives a stable, low anchor point that keeps a front light at hip height, which is exactly where you want the beam for fog running, since it sits below most of the drifting mist.
- Vest or torso layer over the top, positioning the rear light securely at shoulder blade height where it won’t be shadowed by a bouncing hydration bladder or bottle.
- Head-mounted light only if you need it for technical, uneven ground, and only after checking it doesn’t wash out the runner behind or blind oncoming traffic. A chest or waist-mounted light generally beats a headlamp in precipitation, because the lower beam angle throws less glare back off fog droplets.
- Test every mode before you set off. Cycle through flashing and steady settings, confirm battery status, and if your light offers a lower-power mode, use it. Fog rarely calls for maximum lumens, and a lower setting stretches runtime for longer sessions.
Pro Tip: Stand at the roadside, or get a mate to sit in a parked car, and look at your kit from a driver’s viewpoint before you run. It takes five minutes and instantly shows whether your ankle reflectors and rear light read as “person” or just a vague glow, a test STRYQ recommends for exactly this reason.
Anti-bounce matters too. Loose straps shift lights out of position within the first kilometre, so tighten belts and bands until they sit flat against the body, then recheck after a short jog on the spot.
Why less light is often better in fog
Maximum brightness sounds like the safe choice. In fog, it’s frequently the opposite.
Fog is made of countless tiny water droplets, and a powerful beam hits every one of them, scattering light back towards your eyes as glare. This backscatter effect is why a blazing headlamp can leave you seeing less on a foggy morning than a dimmer, well-angled light would. Independent testers of trail running headlamps consistently prefer warmer or broader beams over maximum-lumen white settings specifically because they cut this glare, according to a review of the Nitecore UT27 trail running headlamp.
Roadway lighting research backs up a more nuanced view than “brighter is better,” too. Comparative studies of light types on foggy stretches of road found no single light type consistently extended detection distance, though LEDs did tend to improve colour recognition once something was spotted, according to the Virginia Smart Roads lighting study. That is a useful corrective against chasing raw brightness figures on a spec sheet.
Practical adjustments that make a real difference:
- Mount your main light lower, on a belt or chest, rather than on your forehead, to reduce the angle at which it hits drifting fog
- Switch to a warm-tone setting if your light offers one; cooler white light scatters more visibly in mist
- Use flashing mode for your rear light when traffic is approaching from behind, since a flashing signal draws the eye faster over distance
- Switch to steady mode at junctions or close crossings, where a flashing light can make it harder for a driver to judge your exact position
Test your setup at running pace, not standing still. A beam that looks fine in the driveway can bounce and glare once you’re moving, so a genuine in-run check, done for even a minute before your route properly starts, catches problems a static check misses.
What should you check before buying fog running lights and reflectors?
Buying decisions come down to four practical questions, none of which require comparing specific brands against each other.
Weather resistance. Fog usually comes with damp air and often drizzle, so look for a minimum of IPX4 splash resistance. If you regularly run in heavier rain as well as fog, IP66 or IP67 rated gear will cope with far more than a fair-weather light ever will.
Mounting security. A light that slides or a strap that slips is worse than no light at all, because you stop trusting it and stop checking it. Clips should feel firm without pinching, and elastic straps should have genuine tension left even after a few washes.
Modes and realistic runtime. Manufacturers quote maximum runtime on the lowest setting, which is rarely the mode you’ll actually use. Ask what the runtime looks like on a mid-brightness, warm-tone mode, since that’s the setting most fog running actually calls for.
Reflector coverage and placement options. Look for kit that lets you put reflective material on ankles or wrists, not just the torso, given how much of the conspicuity benefit comes from that biomotion placement.
- Water resistance: IPX4 minimum, IP66–IP67 for regular wet-weather running
- Mounting: secure clips or straps that hold position after repeated wear and washing
- Modes: steady and flashing options, plus a genuine low-power mode for extended runtime
- Reflectors: ankle strap or band options, not torso-only coverage
Where possible, test conspicuity claims yourself rather than trusting a box. A short walk past a parked car with someone watching from the driver’s seat tells you more than any spec sheet.
STRYQ’s approach to building a fog-ready kit
This brand develops its running gear through repeated rounds of sample testing and direct feedback from UK runners, refining fit and function before anything reaches the shop. That process shapes how the current range maps onto a fog visibility kit.
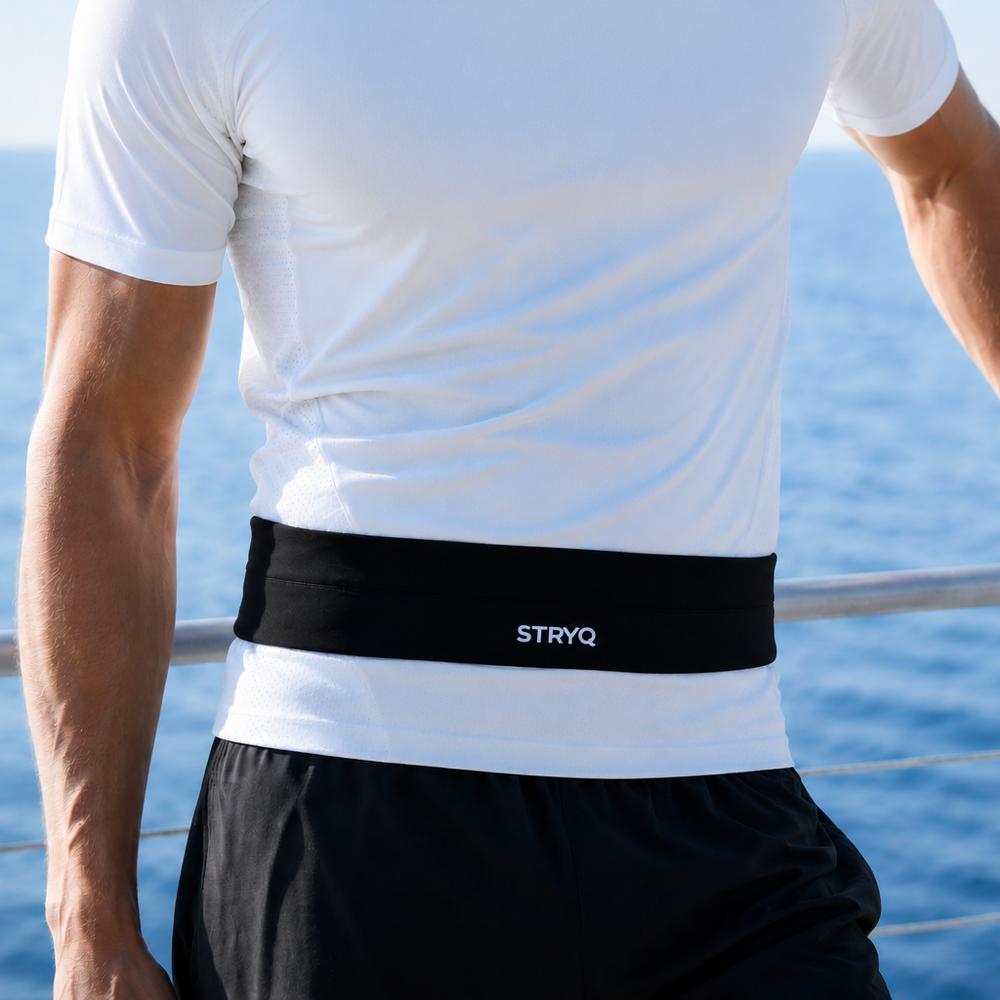
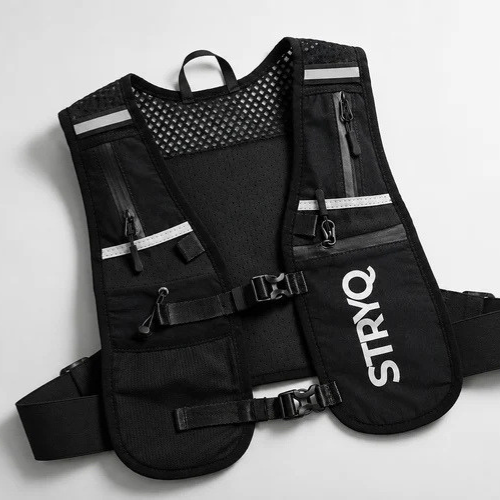
The High-Vis Running Vest & Reflective Bands Kit covers the torso layer and the ankle or limb reflector role in one purchase, built around the biomotion placement principle rather than reflective panels stuck only across the chest. The STRYQ RUNNING BELT gives a stable, low mounting point for a front light or phone, chosen specifically because a low, secure anchor reduces bounce better than clipping a light to lose clothing. The STRYQ HYDRATION RUNNING VEST adds chest-level storage and mounting for longer sessions where you’re carrying more than a phone and a key.
Running socks and soft flasks sit at the edges of a visibility kit rather than at its centre, but they matter to how the whole setup wears over distance. Comfortable, well-fitted socks stop the small irritations that make a runner fiddle with straps and reflectors mid-run, and a soft flask that doesn’t bounce keeps a hydration vest sitting where it should, so the rear light stays put too.
How do popular fog running light products actually compare?
Rather than ranking specific models against each other, it helps to think in categories, since the right choice depends on how and where you run.
Clip-on rear lights are the cheapest entry point into a fog kit and the easiest to retrofit onto existing kit. Most offer flashing and steady modes, and battery life on flashing settings often stretches well beyond a single long run.
Headlamps suit technical trail routes where you need to see the ground, but they are the category most prone to self-glare in fog. A headlamp versus chest light comparison is worth working through before you commit to one over the other, because the right answer depends on your terrain far more than your budget.
Belt-mounted and chest-mounted lights sit lower, which consistently tests better for fog and rain because the beam angle throws less light back off droplets, according to the 2026 running lights review roundup. These pair naturally with a running belt or vest you’re already wearing for storage.
Integrated reflective kit, meaning vests and bands designed around biomotion placement rather than a single reflective logo, consistently outperforms standalone reflective patches stitched onto ordinary running tops. The placement research is consistent enough across studies that this is the category worth prioritising if you only upgrade one thing this year.
None of these categories replace the others. A realistic fog kit usually draws one item from at least three of them.
How do you keep wearable running lights working when you need them?
A light that dies mid-run is a light you can’t rely on, which makes charging habits part of your actual safety kit, not an afterthought.
Charge lights fully after every foggy or low-light run rather than waiting until the indicator flashes red. Lithium batteries in small running lights degrade faster when repeatedly run down to empty, so topping up after use, rather than before, extends usable life across a season.
Store lights and reflective bands somewhere dry between runs. Damp storage is one of the more common causes of clip and button corrosion on cheaper wearable lights, and it’s avoidable simply by not leaving kit in a damp kit bag for days at a time.
Wipe down reflective strips and bands regularly. Retroreflective material only works by bouncing light directly back at its source, and a film of road grime or mud significantly cuts that reflectivity, even though the strip still looks intact to the eye.
Check strap elastic and clip tension every few weeks rather than assuming they’re fine. Elastic degrades with washing and UV exposure well before it visibly frays, and a loose ankle strap defeats the biomotion placement that makes it worth wearing in the first place.
Keep a spare rear light or battery in your kit bag if you run the same fog-prone route often. The rear light is the single item you can least afford to lose function on mid-run, since it’s the primary cue for traffic approaching from behind.
How should your kit change with fog density?
Not all fog is equal, and treating light drizzle-thin mist the same as a genuine pea-souper wastes either your money or your visibility.
Light, patchy fog with decent visibility beyond 50 metres calls for your normal low-light setup: front light on a lower or mid setting, rear light on flashing, ankle reflectors as standard. This is the most common fog you’ll actually run in, and standard settings usually suffice.
Moderate fog, where visibility drops to somewhere between 20 and 50 metres, is where beam angle and brightness choices genuinely start to matter. Drop your front light to its lowest usable brightness, switch to a warmer tone if available, and mount it as low as your setup allows to minimise backscatter.
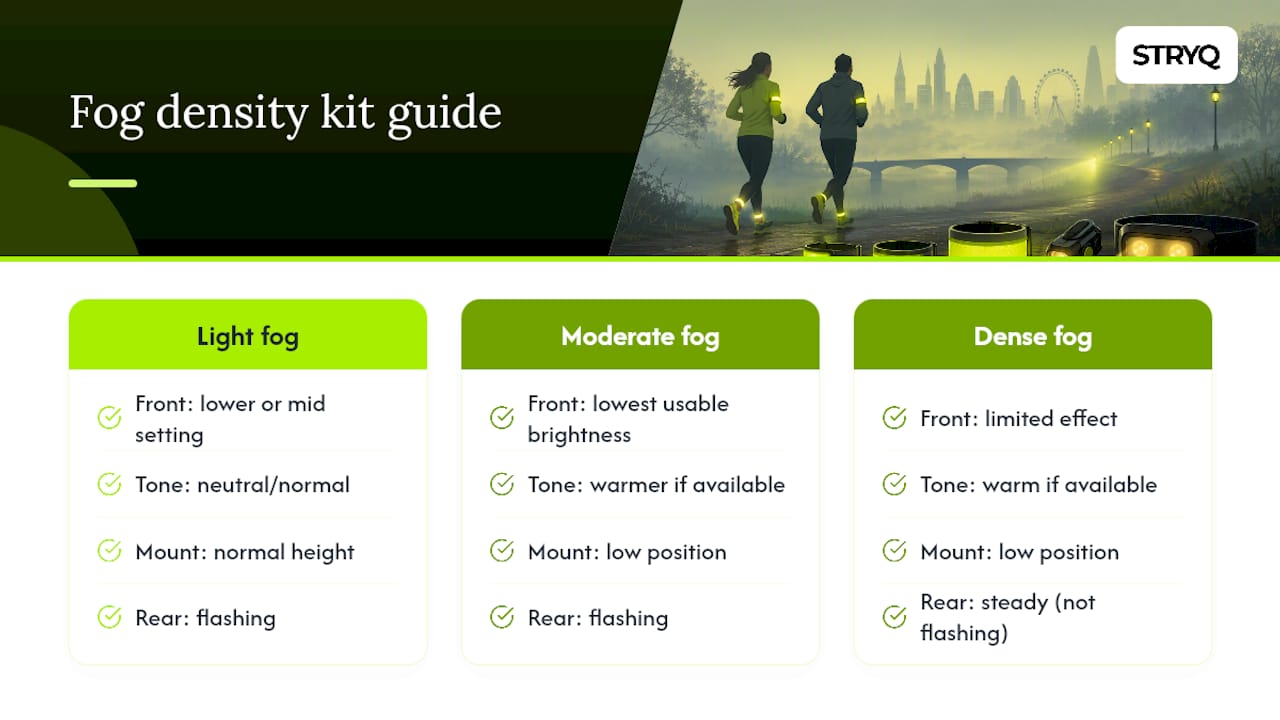
Dense fog, visibility under 20 metres, changes the calculation entirely. At this point, no amount of clever lighting fully substitutes for choosing a safer route, meaning a path or pavement well away from vehicle traffic, or simply rescheduling the run. Rear lights should switch to steady rather than flashing at very close range, since a driver only 10 or 15 metres away needs to judge your exact position, not just notice you exist.
Wind and temperature affect fog behaviour too. Fog often thins in patches on breezy mornings and thickens again in dips and hollows, so treat visibility as something that changes metre to metre on your route, not a fixed condition for the whole run.
The overlooked mistake: chasing lumens instead of placement
Most advice on running visibility gets fixated on brightness, as though the number on the box is the whole story. It isn’t, and the research bears that out. Roadway lighting comparisons found no consistent detection-distance advantage from brighter lights in fog, while placement studies found ankle and wrist reflectors delivering recognition gains measured in multiples, not percentages.
That gap between what gets marketed and what the evidence supports is the real story here. A £15 pair of reflective ankle bands, correctly positioned, likely does more for your safety on a foggy Tuesday morning than doubling the lumen output of your front light. Runners who treat lighting and reflectivity as one combined system, rather than buying the brightest single item they can afford, end up with a kit that actually performs across the range of conditions a British autumn or winter throws at them.
Where the conventional advice falls short is in treating fog running gear as a single-product problem. It isn’t. It’s a system of redundant, complementary signals, and the weakest link is usually the piece nobody thinks about: the ankle strap gathering dust in a drawer because the vest alone felt like enough. It rarely is.
If you take one thing from this and act on it this week, make it placement over power. Move a reflective strip to your ankle before you spend another penny on a brighter light.
— martin
Where to get the kit that actually covers you in fog
Building this kit doesn’t mean buying five different brands and hoping they fit together. The running range is designed so the pieces work as one system, tested through repeated feedback from UK runners rather than assembled from whatever happened to be available.
For the torso layer and ankle biomotion placement in a single purchase, the High-Vis Running Vest & Reflective Bands Kit covers both roles this article recommends. For a stable, low mounting point that keeps a front light steady at hip height rather than bouncing on loose clothing, the STRYQ RUNNING BELT does the job. If you’re running longer and need storage alongside secure chest mounting, the STRYQ HYDRATION RUNNING VEST adds that without sacrificing fit. Round out a longer session with a STRYQ 500ml Running Soft Flask that sits flat rather than shifting your vest out of position, or browse running socks built with arch support to stop mid-run fiddling that knocks your other kit out of place.
Every item is developed through sample revisions and direct runner feedback, not built around the lowest possible price. Browse the full running gear collection and put together the kit roles above before your next dawn or fog-bound run.
Sources
- Making night-time pedestrians safer using innovative clothing designs
- Effects of retroreflector placement on the nighttime conspicuity of pedestrians: an open-road study
- Enhancing visibility and aesthetics of warning clothing for non-professional use via active and passive lighting
- Nitecore UT27 trail running headlamp – reviewed & tested
- 9 Best running lights of 2026 (tested & reviewed)
FAQ
Do I need both a light and reflective strips for fog running?
Yes. Active lights and retroreflective material respond to different conditions, and combining both extends visibility across more scenarios than either alone, according to research on active and passive lighting. Skipping one leaves a genuine gap in how drivers spot you.
Where should reflective strips go for the biggest visibility gain?
Ankles and wrists, not just the torso. Biomotion placement on moving joints significantly increases recognition distances compared to standard sports clothing, according to research on innovative clothing designs.
Should I use maximum brightness on my running light in fog?
No. High-lumen beams scatter off fog droplets and create backscatter glare that can reduce what you can actually see, according to testing of the Nitecore UT27 headlamp. A lower, warmer, broader beam mounted low on the body works better in mist.
What’s the difference between a headlamp and a chest or belt-mounted light in fog?
A lower-mounted light throws less glare back off precipitation than a forehead-mounted headlamp, according to independent running light reviews. Headlamps still suit technical trail footing, but a belt or chest light generally performs better on foggy road and path running.